Overview
To help you test the Creo.JS scripts with current Creo session, a testing web tool is provided with the Creo.JS installation. The tool provides an interactive user interface to work with Creo.JS APIs. You can test the APIs before using them in web applications. The page is called script_engine_testing.html and is available in creojsweb folder at <creojs_loadpoint>. To start using it, drag and drop the page in the Creo embedded browser. You can add the page location to favorites also.
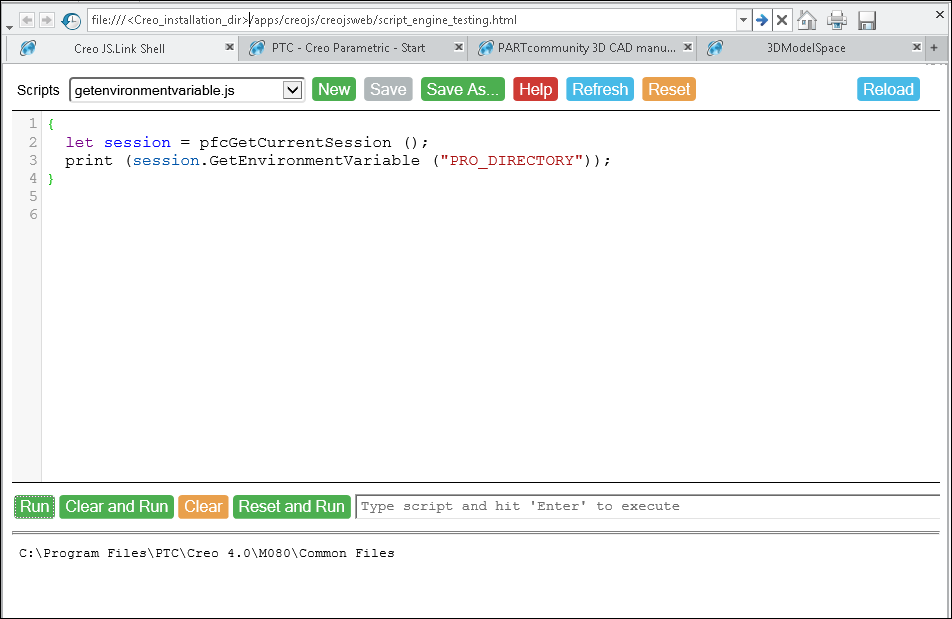
Figure 1
The page consists of four areas:
| • | Creo.JS scripts toolbar |
| • | Creo.JS script edit area |
| • | Creo.JS script execution toolbar |
| • | Creo.JS script output area |
To run a script, type the script in the editor and click Run.
The script is sent to Creo.JS engine and executed. After execution, the output generated by the script is printed in the output area. In the example shown
in Figure 1, the following script is executed in the tool:
{
  let session = pfcGetCurrentSession ();
  print (session.GetEnvironmentVariable ("PRO_DIRECTORY"));
}
The following result is displayed in the output area:
C:\Program Files\PTC\Creo 4.0\M080\Common FilesNote that the script is included in curly braces. This prevents the variable definitions within the script to be populated
into the page context, which can prevent the consecutive execution of the same script. If you do not add the curly braces,
the script can be executed only once. If you try to run it for a second time you will get an error message.
Every script executed by this page is executed in the very same context. Thus, after the script is executed the first time,
the context has a new variable session defined in it. When the script is executed the second time, it tries to define already
defined variable and fails. If we add { and } to the scripts, we limit the visibility area for variable session by the block
specified by its boundaries { and }. Thus, after the script is executed the variable session is removed from context and can
be reused.

